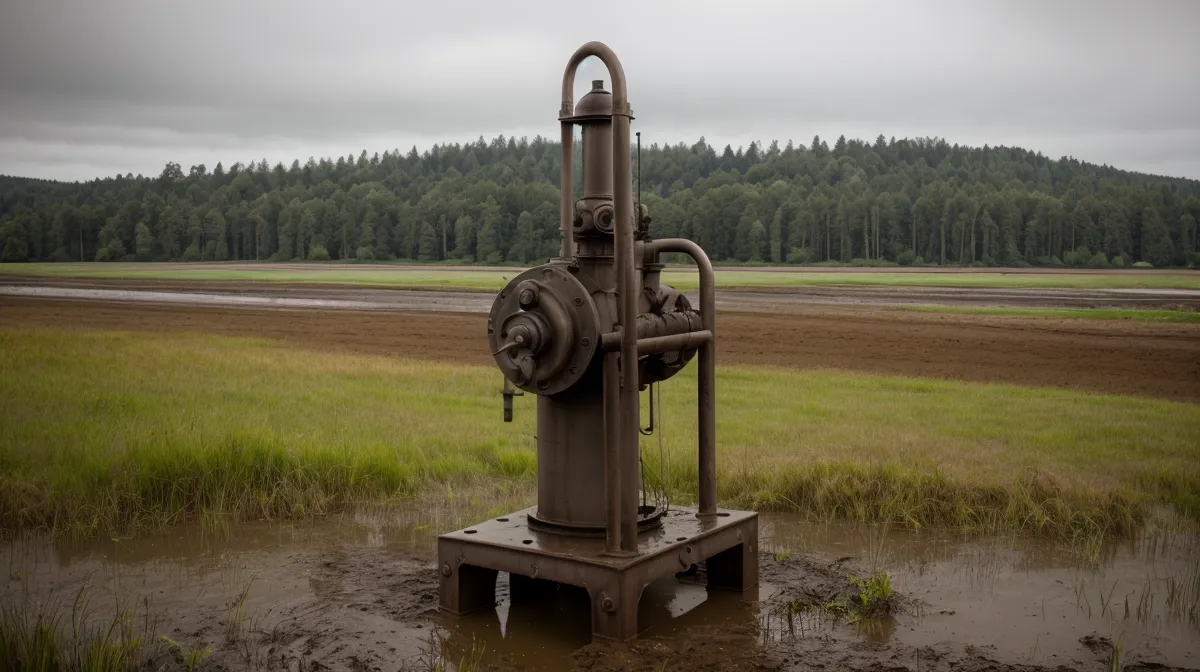
One gray morning this past March, after the creek finally receded from its uninvited tour of our lower pasture, I stood in my muck boots staring at the well head. The familiar hum of the pump—a sound that usually means a hot shower or a clean load of laundry—felt like a threat rather than a comfort. I knew that brown, silty floodwater had likely seeped into the very thing we drink every day, and for the first time since moving from Portland, I felt the full weight of being my own utility company.
Back in the city, if the water looked funny, I’d just call the landlord or check the news for a city-wide alert. Out here? There is no landlord. There’s just me, a partner who was currently trying to keep the chickens from drowning in a giant puddle, and a well that was potentially full of things I didn’t want to think about. I’m not a hydrologist, an engineer, or even particularly handy—I’m just someone who has learned that homesteading is mostly about figuring things out with a wrench in one hand and a manual in the other.
The DIY Utility Company (Me)
After the floodwaters retreated, I did what any panicked former-city-dweller does: I hit the internet. I found the Oregon Health Authority (OHA) website and saw the daunting 'boil water' advisory that seemed to apply specifically to my little five-acre slice of the world. Floodwater can introduce all sorts of nasties like coliform bacteria and E. coli into private wells through the casing or even the air vents.
It was a sobering realization. If I didn't fix this, we were looking at weeks of hauling jugs from the store just to brush our teeth. This is one of those common well water problems for people moving from the city that they don't mention in the real estate listing. You are the treatment plant, the technician, and the quality control officer all rolled into one.

The Waiting Game: Why You Shouldn't Rush the Bleach
My first instinct was to dump a gallon of bleach down the pipe the second the creek went back to its banks. I wanted that water clean *now*. But I’m glad I took a breath and talked to a neighbor who has been out here since the seventies. He gave me the single most important piece of advice: wait.
Shocking your well immediately after a flood can actually backfire. If the ground is still a saturated sponge, the water table is high and everything is under pressure. If you pour a heavy concentration of chlorine down there while the surrounding ground is still full of floodwater, you might actually force surface pathogens deeper into the aquifer instead of killing them. You’re essentially using the well as an injection point for the very bacteria you're trying to get rid of. I had to wait nearly a week for the soil to dry out enough that the well wasn't under 'recharge' pressure from the surface runoff.
The Math (and Why I Hate It)
Once the ground was firm enough that I didn't sink to my ankles, it was time for the math. I’m not talking about high school calculus, but the kind of math that involves 6-inch diameters and depth-to-water ratios. Most residential wells in our area use a standard 6-inch well casing, which holds about 1.5 gallons of water per foot of depth.
I had to dig out our original well log—a piece of paper I’ve guarded like the Dead Sea Scrolls since we moved in—to find the total depth. Measuring out the bleach felt like a high-stakes chemistry experiment. I used standard household bleach with a concentration of 5.25% sodium hypochlorite. You have to be careful here; don't use the 'splash-less' or scented stuff unless you want your drinking water to smell like 'Mountain Meadow' for a month.
The Great Pour: Chlorinating the Well
The moment of truth came when I had to actually open the well cap. I felt like I was performing surgery on the house. I unscrewed the bolts, lifted the heavy metal lid, and was immediately greeted by the damp, metallic smell of the deep earth. There is no turning back once the chlorine goes down the pipe.
As I poured the bleach mixture in, I experienced that sharp, swimming-pool sting of chlorine hitting my nose while standing in damp boots in the middle of a muddy field. It’s a sensory memory I won’t forget—the smell of 'clean' clashing with the smell of 'flood.' One of my hens, a particularly nosy Rhode Island Red, kept trying to peck at the bright blue bleach bottle, convinced it was some kind of giant treat. I had to gently boot her away while trying not to spill a drop of concentrate on my boots.
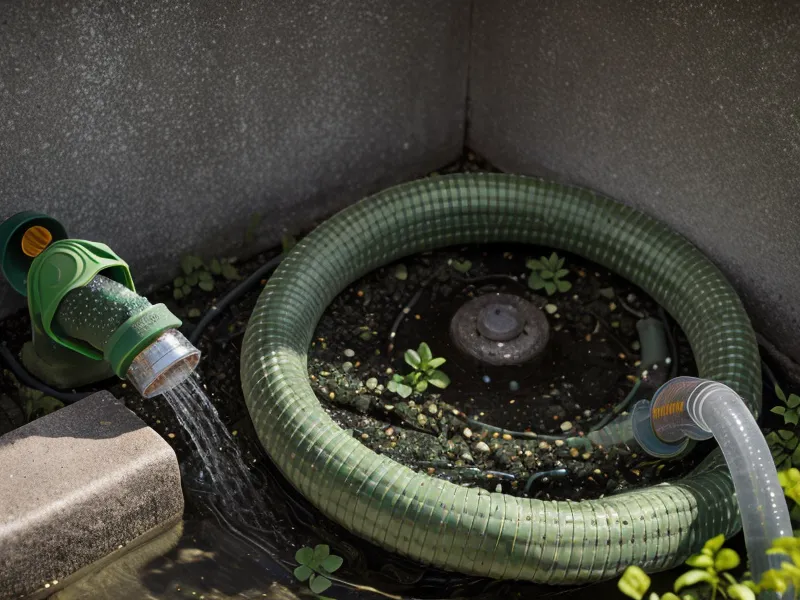
The Circulation Cycle and the Hose Incident
After the bleach is in, you have to circulate it. This involves running a garden hose from an outdoor spigot right back into the well head. The goal is to wash down the inside of the casing and make sure the chlorinated water is mixed all the way through. The tutorials make this sound like a ten-minute job. In reality, it takes much longer to get that chlorine smell coming out of the hose.
This is where I had my first major 'city person' failure. I realized halfway through that I didn't have enough garden hose to reach the drainage ditch on the far side of the barn for the later flushing phase. In my haste to get started, I almost flooded my own vegetable garden with bleach-heavy water. I had to scramble, mid-process, to find extra lengths of hose and some of my trusty zip ties to keep the connections from leaking. If I had let that water hit the kale, I would have had the cleanest, deadest vegetables in Oregon.
The Flushing Phase and the Septic Scare
Once the water in the well is circulated and you smell the chlorine at every tap in the house, you have to let it sit. The OHA recommends a contact time of 24 hours. We spent that day living like we were camping—using bottled water for everything and reminding each other not to turn on the taps.
The next day is the 'flush.' You have to run the water until the chlorine smell is completely gone. This is where I started to panic about my septic tank. I knew from reading about what I wish I knew about maintaining a septic system for beginners that you shouldn't dump massive amounts of chlorinated water into your leach field. It kills the 'good' bacteria that makes the septic system work. I had to be careful to run the outside hoses—not the indoor faucets—to clear the bulk of the chlorine, making sure that water drained far away from my septic lines and my garden.
The Lab Results and the Relief
Two weeks later, after the chlorine was long gone, I finally took a sample to the local lab. It’s a nerve-wracking wait. You spend three days wondering if you did the math right or if you missed a spot of bacteria hiding in a pipe elbow.
I’ve become a bit of a regular at the testing lab. Earlier this year, I went through a whole saga that I wrote about in my experience testing well water for heavy metals after moving in, so the technicians there already know me as the 'frazzled lady with the chickens.' When the email finally popped up with 'Absent' next to Total Coliform and E. coli, I let out a breath I feel like I’d been holding since the creek first breached its banks.
Homesteading isn't about knowing everything. If I’ve learned anything in these three years, it's that you just have to be willing to try. I’m not an expert, and I’ll probably make another mistake next winter, but for now, the water is clear, the chickens are dry, and the well pump is humming a much friendlier tune. If you're facing your first well shock, just remember: take it slow, do the math, and for heaven's sake, make sure your hose is long enough.